Low-Light Houseplants That Actually Thrive
Five plants that grow well in corners and poorly lit rooms. Real options for British homes without expensive grow lights.
Read GuideSigns your plant needs a larger pot, step-by-step repotting instructions, and what soil mixes work best for different plant types.


Most people don't repot nearly enough. Your plant sits in the same pot for years, roots circling round and round until they've nowhere left to grow. It's not about aesthetics — it's about survival. When roots run out of space, they can't absorb water or nutrients properly. The plant starts to weaken.
Here's the thing though: repotting isn't complicated. You don't need special equipment or advanced knowledge. It's one of those tasks that sounds harder than it actually is. We're going to walk you through exactly when to do it, how to do it right, and what mistakes to avoid.
Spring is your best window. March through May, plants are waking up and ready to establish themselves in fresh soil. They'll recover faster and adjust better to their new pot. You can repot in summer too, but growth slows during the heat, so spring's really ideal.
How often? Most houseplants need repotting every 12-18 months. Fast growers like philodendrons might want it annually. Slow growers like snake plants can go 2-3 years. The key's watching your plant, not following a calendar. If it's showing those signs we mentioned — roots coming out the bottom, water draining too fast — it's time. Don't wait.
And avoid repotting during dormancy. Winter, when your plant's basically sleeping, isn't the moment. It won't have energy to adjust to new soil. Same goes for freshly repotted plants during flowering. Let them finish blooming first.
It takes about 15-20 minutes per plant. Here's exactly how to do it right.
You'll need the new pot (1-2 inches larger in diameter), fresh potting mix, newspaper to work on, and maybe a wooden spoon for pressing soil. Have a small bucket of water nearby. That's genuinely it.
Water it thoroughly about an hour before repotting. Moist soil comes away from the pot edges more easily. Dry soil sticks and damages roots. It's a small thing that makes the whole process smoother.
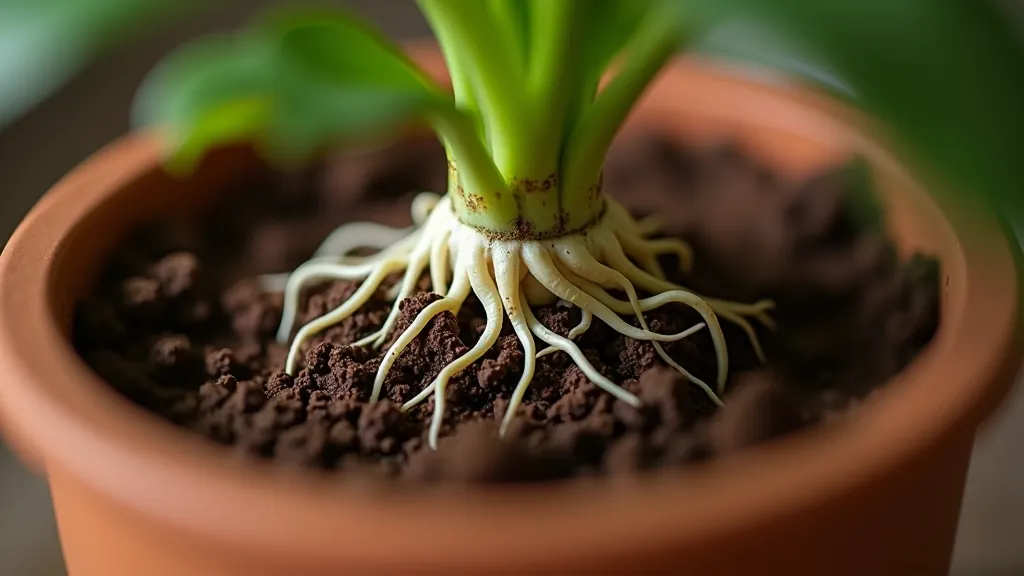
Tilt the pot on its side. Support the plant base with one hand while you slide the pot away with the other. If it's really stuck, run a knife around the inside edge. Never pull the plant by the stem — you'll snap it.
Gently tease apart the roots with your fingers. This looks aggressive but it's necessary. Those tightly wound roots won't extend into fresh soil unless you help them break free. Just be careful not to tear them.
Fill the new pot about a third of the way with fresh potting mix. The plant should sit at roughly the same depth as before — not higher, not lower. Soil level matters more than people think.
Center the plant in its new home. Fill soil around the sides, pressing gently as you go. Fill until soil reaches the same level as before. Don't bury the base of the stem — that invites rot.
Water thoroughly until it drains from the bottom. This settles the soil and helps roots make contact with their new medium. Keep the plant out of direct sun for a few days while it adjusts.
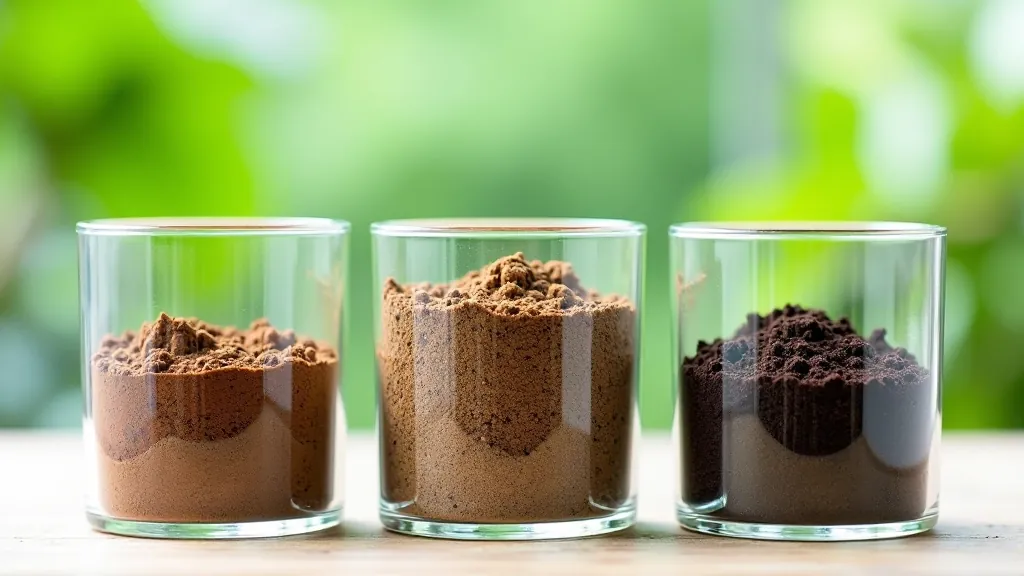
Not all potting mixes are equal. Standard multipurpose compost works for most common houseplants — monstera, pothos, rubber plants. But specific plants need adjustments.
Succulents and cacti? They're drought-lovers. Use a gritty cactus mix or add extra perlite to standard compost. Orchids want something completely different — bark-based mixes with chunky texture for air flow. African violets prefer something lighter and airier than standard.
The pattern you'll notice: moisture-loving plants need soil that holds water a bit longer. Drought-tolerant plants need soil that drains fast. You can modify any potting mix by adding perlite (improves drainage) or coir (retains moisture). Start with 70% base mix and 30% amendment, adjust from there based on how your plant responds.
Going too big at once is the most common error. A pot that's 4-5 inches larger creates excess soil that stays wet longer. Roots can't absorb it all fast enough, leading to root rot. Stick to 1-2 inches larger maximum.
You've already watered thoroughly during the process. Watering again immediately can cause waterlogging. Wait 3-5 days before your next watering, then check soil moisture first. Newly repotted plants need less frequent watering initially.
Freshly repotted plants are stressed. Putting them in intense direct sun amplifies that stress. Keep them in bright indirect light for the first week. They'll recover better and establish faster.
Reusing old potting mix seems economical but it's a false economy. Old soil has compacted, lost nutrients, and may harbour pests or diseases. Fresh soil costs next to nothing. It's worth it.
Terracotta is brilliant for plants that like drying out between waters. It's porous, so soil dries faster. Cacti, succulents, and snake plants thrive in terracotta. But they're heavy and fragile, which matters if you're moving plants around.
Plastic pots are lightweight and affordable. Soil retains moisture longer, which suits moisture-loving plants. They're practical for frequent movers. Ceramic and glazed pots sit somewhere in the middle — they're attractive and fairly neutral for most plants, though they don't breathe like terracotta.
Fabric grow bags are gaining popularity and honestly, they're excellent. They're breathable, prevent root circling, and encourage healthy root development. They're also the most eco-friendly option. The downside? They're less attractive if you care about aesthetics, though you can hide them in decorative outer pots.
Repotting is genuinely one of the most straightforward plant-care tasks you'll do. You don't need to overthink it. Watch your plants, repot when they're showing signs they need it, use fresh soil, and you're done. Most problems come from either doing it too aggressively (oversized pots) or putting the plant under extra stress immediately after (full sun, overwatering). Avoid those two things and you'll have healthy, thriving plants.
Your plants will show their appreciation within weeks. New growth appears faster, leaves look healthier, and the whole plant just seems more vigorous. That's what fresh soil, room to grow, and a healthy root system do. It's not magic — it's just giving your plants what they need.
This guide provides educational information about repotting houseplants based on general horticultural principles and best practices. Plant care needs vary significantly based on species, local climate, and individual growing conditions. While the techniques described here are widely used and generally effective, results may vary. We recommend consulting specific care guides for your particular plant species and observing your individual plants' responses to repotting. If you're new to plant care, consider starting with hardy, forgiving species. Every plant is different, and what works perfectly for one may need adjustment for another.